
hot-swappable keyboards explained is a practical guide from Keyboards Technology that makes mechanical keyboard tinkering simple. Here I explain what a hot‑swappable keyboard is — the ability to change switches without soldering — and cover sockets, switch types, how to swap, pros and cons, compatibility, and quick fixes. This is for beginners and hobbyists who want fast customization, easy repairs, and confident upgrades.
Key takeaways — hot-swappable keyboards explained
- Swap switches fast without soldering using a hot‑swap board.
- Test linear, tactile, and clicky switches in minutes.
- Confirm 3‑pin vs 5‑pin socket compatibility before buying.
- Customize keys and macros with QMK/VIA or the keyboard app.
- Maintain and upgrade easily — no soldering required.
What I mean by “hot‑swappable keyboards explained”
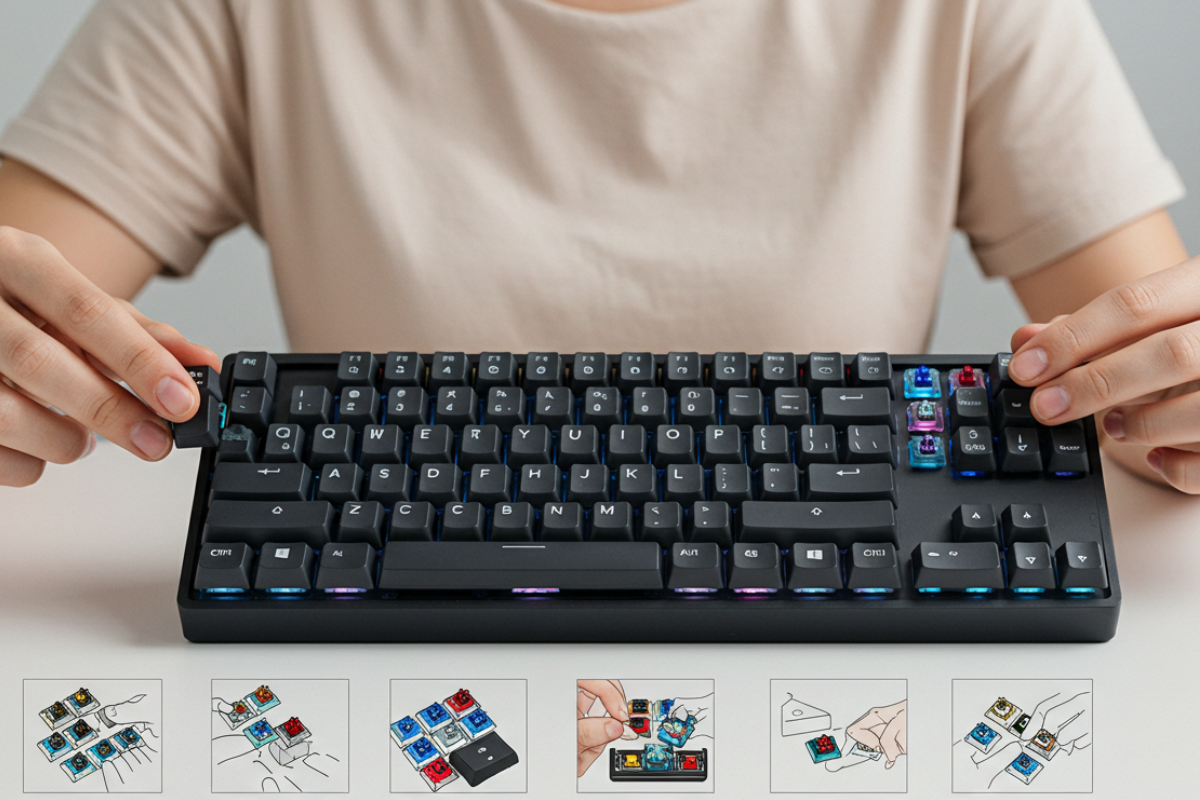
A hot‑swappable keyboard lets you remove and install switches without a soldering iron. A simple pull and push swaps the switch, lowering the barrier to customizing typing feel and sound. That one feature saves time and makes experimentation low‑risk.
Hot‑swappable vs soldered PCBs
A quick difference:
- Hot‑swappable PCB: uses sockets that grip switch pins; ideal for fast testing and repairs.
- Soldered PCB: switches are fixed with solder; more permanent and often very durable, but requires tools and skill to change.
| Feature | Hot‑swappable | Soldered |
|---|---|---|
| Swap speed | Fast — minutes | Slow — desolder/resolder |
| Tools needed | Keycap & switch puller | Soldering iron, desoldering tools |
| Beginner friendly | Yes | No |
| Repair ease | Easy to replace single switches | Harder; may require full board repair |
| Durability over many swaps | Varies by socket quality | High (no socket wear) |
| Customization | Great for trying many switches | Possible but harder |
With hot‑swap I change switches in under five minutes. With soldered boards I risk damage and spend hours.
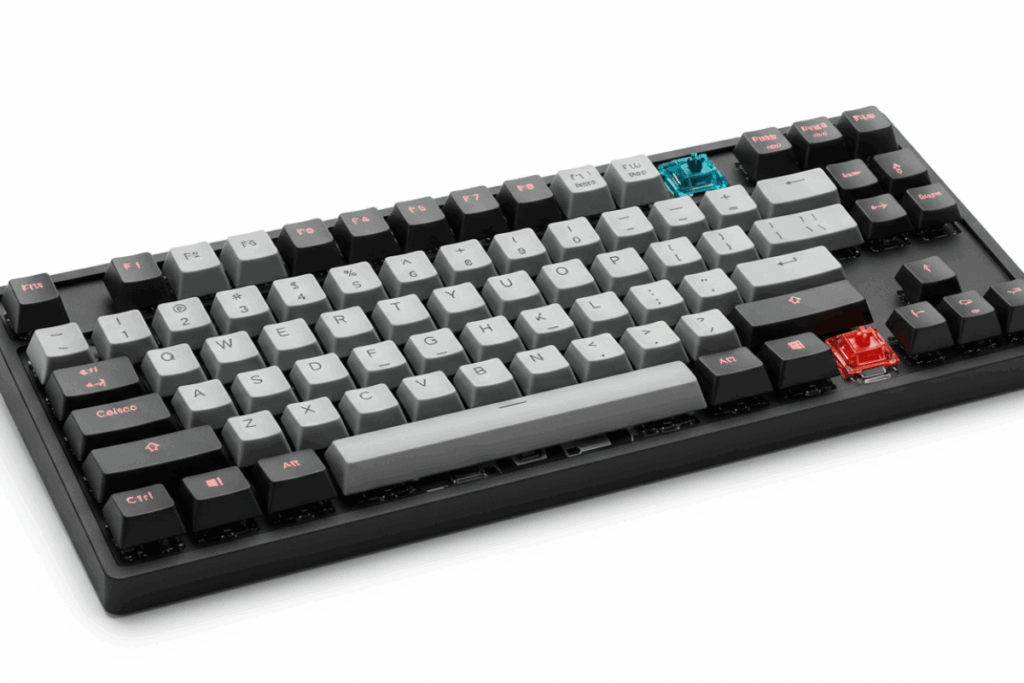
Common switch types you’ll use
Most hot‑swap boards accept MX‑style switches. The three common types:
| Switch type | Feel | Sound | Good for |
|---|---|---|---|
| Linear | Smooth, no bump | Quiet | Fast typing, gaming |
| Tactile | Bump on actuation | Medium | Typists who want feedback |
| Clicky | Bump loud click | Loud | Those who love audio feedback |
Note: 3‑pin switches use two metal pins plastic peg; 5‑pin add two stabilizer pins. Many hot‑swap sockets accept 3‑pin only or both 3/5 with plate support. Always check compatibility.
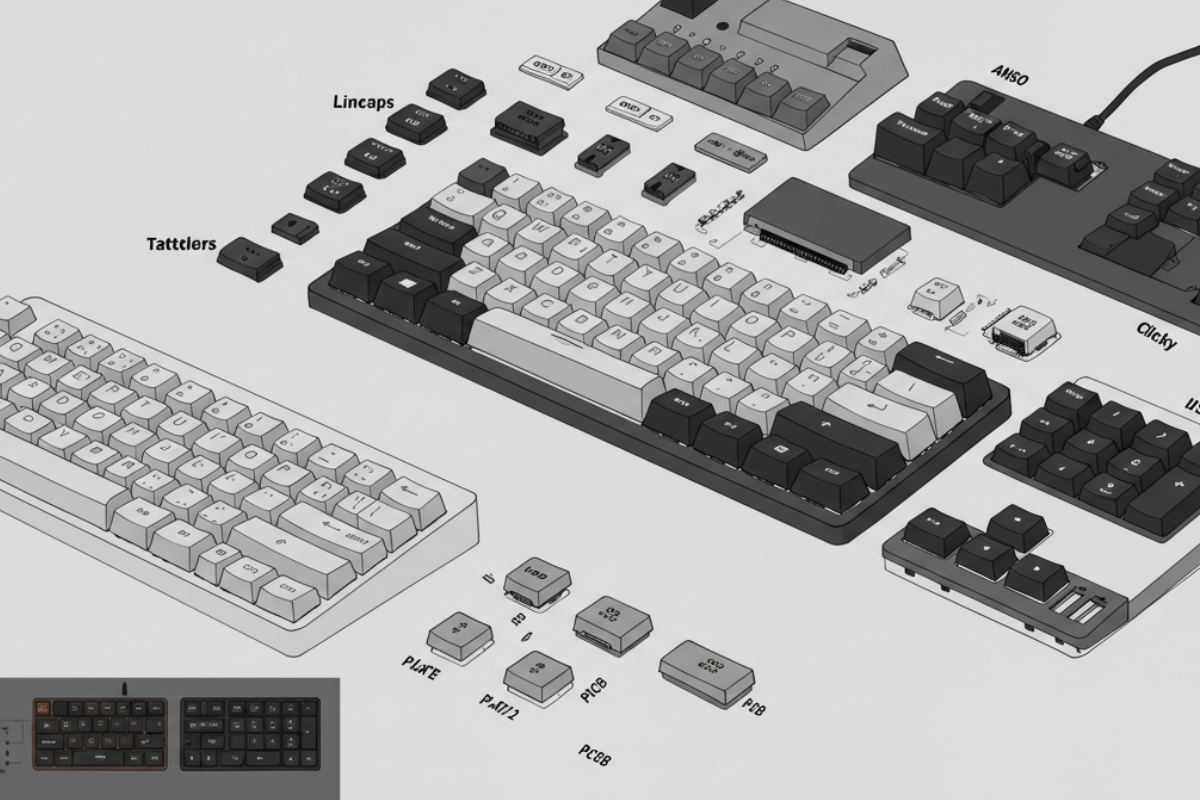
How hot‑swap sockets work
- A hot‑swap socket is a small metal receptacle on the PCB that grips switch pins and completes the electrical connection.
- 3‑pin vs 5‑pin matters for mechanical fit and stability.
- Sockets can wear after many swaps; gentle pulls and proper tools help them last.
| Socket type | Pins accepted | Notes |
|---|---|---|
| 3‑pin | 3‑pin switches | Most common |
| 5‑pin | 3‑pin & 5‑pin (if plate allows) | Adds stability for some switches |
My routine: remove keycaps, use a switch puller, clean the well if needed, insert the switch straight, and test.
Why I like hot‑swappable keyboards — real benefits
In short, hot‑swappable keyboards explained means fast, low‑risk customization. I can try different switches, fix a single bad switch, or upgrade over a weekend — no soldering fumes, no special equipment.
Benefits:
- Fast switch testing and personalization: try a switch for 10 minutes and decide.
- Save time and money: replace a single failed switch rather than ship for repair.
- Easy experimentation with lubing, films, and foam — revert changes easily.
Quick examples:
- Mix switches for different keys (thumbs vs fingers).
- Use foam to tune acoustics.
- Replace one faulty switch for a few dollars in minutes.
Choosing the right board: socket, plate, and layout
When shopping, confirm these core items:
- Is it labeled hot‑swappable?
- Does it support 3‑pin or 5‑pin switches?
- Is it plate‑mounted or PCB‑mounted?
- What layout do you prefer (Full, TKL, 65%, 60%)?
- Plate and case material affect tone: aluminum (bright), brass (deep/thock), polycarbonate/FR4 (warm/neutral).
- Case material shifts tone and weight: plastic (muted), aluminum (brighter).
If you plan to use 5‑pin switches, check both plate and PCB hole layouts. Some hot‑swap boards only accept 3‑pin despite having common sockets.
Short buying checklist:
- Labeled hot‑swappable?
- Socket type: 3‑pin or 5‑pin?
- Layout: TKL or 65% recommended for first builds.
- Plate & case: plastic case polycarbonate/FR4 plate is a mellow start.
- Stabilizers: pre‑lubed or easy to mod are a plus.
- Get a keycap puller and switch puller before starting.
Recommended beginner models I often use:
- Glorious GMMK (Compact/TKL) — true plug‑and‑play.
- Keychron K6 / K8 (hot‑swap versions) — wireless wired options.
- Akko 3068 (hot‑swap) — pleasant stock keycaps and build.
- Keyboards Technology starter boards — clear guides and support.
How to hot‑swap switches — step‑by‑step
Tools: keycap puller, switch puller, soft cloth, optional lube and switch opener.
Steps:
- Power off and unplug the keyboard.
- Remove the keycap with a keycap puller (pull straight up).
- Use the switch puller to grab the switch sides and pull straight out.
- Inspect the socket for debris; clean if needed.
- Align replacement switch pins to the socket and press straight down until it clicks.
- Replace the keycap and plug in to test.
Compatibility notes:
- 3‑pin switches fit most hot‑swap sockets.
- 5‑pin switches need plate/PCB support for stabilizer pins.
- If a switch won’t seat, check for bent pins or plate interference — never force.
Quick checklist: power off → remove caps → pull switch → seat new switch → test.
Mods, sound tips, and small upgrades
Hot‑swap makes mods cheap and reversible. My favorite quick changes:
- Lubing switches — smooths friction and reduces scratchy sounds (use sparingly).
- Switch films — reduce wobble between top/bottom housings for a tighter sound.
- Case/plate foam — dampens hollowness and reduces ping.
| Mod | What it does | Tools | Result |
|---|---|---|---|
| Lubing | Smooths friction | Switch opener, lube, brush | Cleaner, quieter, smoother press |
| Switch films | Reduces wobble | Thin films | Tighter sound, more solid feel |
| Foam | Dampens reverb | Foam sheet, scissors | Deeper, warmer tone |
Example: swap to linear switches, lube a few, add foam — board goes from bright/pingy to rich/quieter in a couple of hours for under $15.
Why hot‑swap matters: you can A/B test mods and revert quickly by pulling switches.
Troubleshooting common hot‑swap issues
Symptoms and fixes:
| Symptom | Likely cause | Quick fix |
|---|---|---|
| Key not registering | Bent switch pin or dirty contact | Remove switch, straighten pin, reseat |
| Key registers intermittently | Misseated switch | Reseat switch firmly; test |
| Key feels mushy | Bent pin or broken spring | Swap in a spare switch |
| Socket feels loose | Worn hot‑swap socket | Try different switch; avoid forcing incompatible pins |
Step routine:
- Remove keycap.
- Pull switch straight out.
- Inspect pins and socket with a magnifier.
- Straighten bent pins gently with tweezers, or replace switch.
- Reinsert switch, press until it clicks, and test in software or an online key tester.
Quick fixes before panic:
- Reseat the switch.
- Swap the problem switch with a known spare.
- Clean the key well and socket area.
- Check the keycap for damage.
- Avoid forcing a 5‑pin into a 3‑pin plate.
Conclusion — hot‑swappable keyboards explained (short)
hot‑swappable keyboards explained: they make customization easy, fast, and low‑risk. You can swap linear, tactile, or clicky switches without soldering, tune sound with lubing, films, and foam, and fix most issues by reseating or replacing a single switch. The essentials: check 3‑pin vs 5‑pin compatibility, verify plate vs PCB layout, and don’t force a fit.
Keep a small kit — keycap puller, switch puller, spare switches — and start simple: test one switch, learn, then expand.
Frequently Asked Questions — hot‑swappable keyboards explained
Q: What does “hot‑swappable keyboards explained” mean?
A: It means the guide shows how hot‑swap works: pull switches out, push new ones in — no solder needed.
Q: How do hot‑swappable keyboards work?
A: Each switch plugs into a hot‑swap socket on the PCB. The socket grips the pins and makes the electrical contact.
Q: Can I swap switches myself?
A: Yes. Power off, use a keycap puller and switch puller, then seat the new switch.
Q: Are hot‑swappable keyboards good for beginners?
A: Absolutely — they let you try switches and mods without special tools.
Q: Will a Keyboards Technology hot‑swap board fit many switches?
A: Usually yes for MX‑style switches. Check product specs for 3‑pin vs 5‑pin compatibility.
Q: How many times can I swap before sockets wear out?
A: It depends on socket quality and care. Gentle pulls and correct alignment extend socket life.
Q: Should I choose hot‑swap or soldered?
A: Choose hot‑swap if you value experimentation and easy repairs. Choose soldered if you prefer a permanent build and maximum durability over decades of swaps.