I wrote this guide about keyboards with removable keycaps to walk you through everything I check when buying and customizing gear from Keyboards Technology.
I explain why hot-swap is friendlier than soldered for new users, layout choices I find easiest, how to check stems and bottom-row fit, which keycap materials and legend types last, common profiles and how they feel, and the simple tools and steps I use to remove and replace caps safely. Tips are short and usable so you can start swapping caps with confidence.
Key Takeaway — keyboards with removable keycaps
- I can pop off keycaps to clean and keep my keyboard fresh.
- I swap keycaps to change the look without buying a new board.
- I fix sticky or broken keys fast by replacing caps or switches.
- I prefer hot-swap boards for fast, low-risk experiments.
- For support and parts I often turn to Keyboards Technology.
Why I recommend hot-swap and simple layouts for keyboards with removable keycaps
Hot-swappable vs soldered PCBs — why hot-swap is beginner-friendly
I learned to love keyboards by swapping switches at my desk. A hot-swap board let me try new switches in minutes — no soldering iron, no risk.
- Hot-swap = plug-and-play switches.
- Soldered = permanent unless you desolder.
Hot-swap boards let you test feel and sound without risk: mix switches for the spacebar, try tactile vs linear, and change quickly. That saves time and money.
Common sizes and which I find easiest
| Layout | Keys (approx.) | Pros | Cons | My pick |
|---|---|---|---|---|
| Full | 104–108 | Numpad and all keys (great for spreadsheets) | Large | Not for most beginners |
| TKL | ~87 | Balanced; compact without numpad | Slight arrow-cluster learning | My top pick |
| 75% | 80–84 | Compact but retains arrows & function row | Tighter spacing | Good if you want compact |
| 65% | 67–72 | Small, keeps arrows; great for desk space | No function row | Great portable choice |
| 60% | 61 | Very compact | Layer use required | Harder for beginners |
I recommend TKL to start: familiar key positions and desk-friendly. If you travel with a board, 65% is my favorite compromise.
Quick beginner checklist for choosing a hot-swap board
- Pick a hot-swap PCB so you can change switches without soldering.
- Choose a simple layout like TKL or 65%.
- Confirm switch compatibility: most boards use MX-style sockets.
- Ensure keycaps are removable and the board uses standard bottom-row sizes.
- Look for decent stabilizers on larger keys.
- Prefer vendors with clear compatibility notes (e.g., Keyboards Technology).
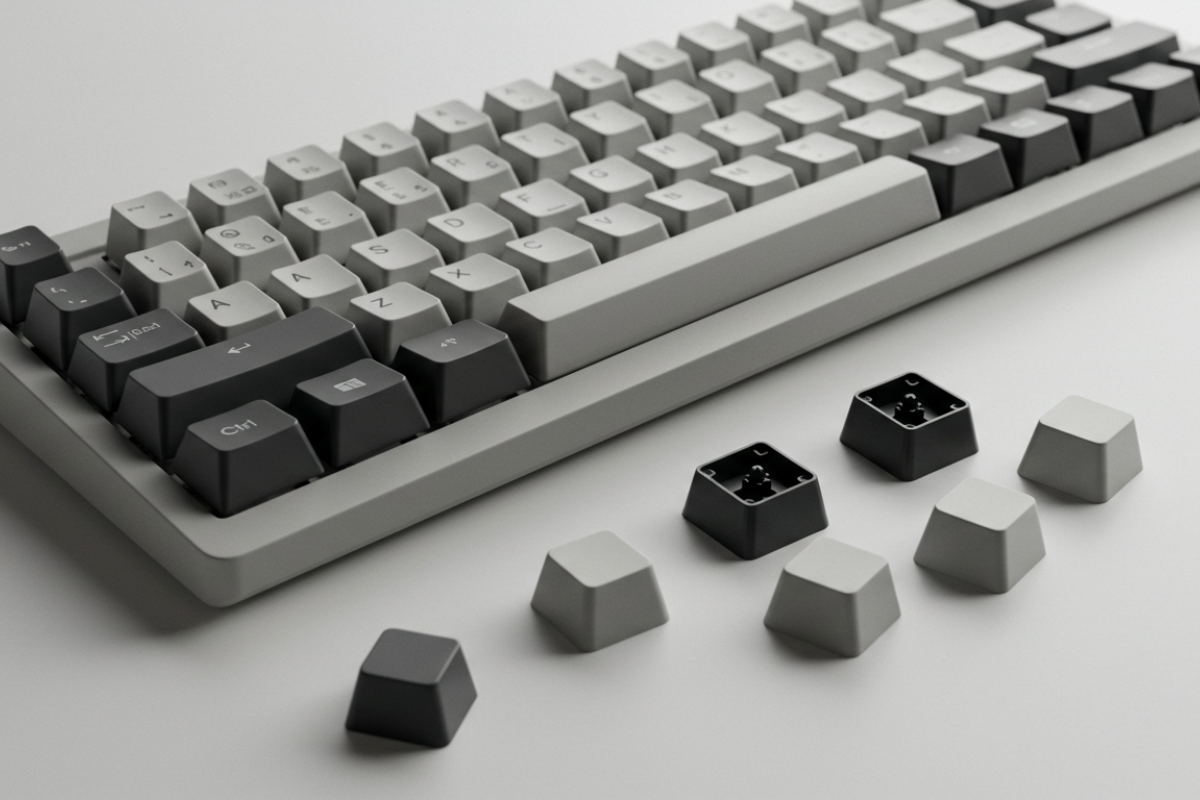
Keycap compatibility I check before buying keyboards with removable keycaps
Cherry MX stems and clone stems — what fits and why it matters
Start with the stem: most sets fit Cherry MX-style stems (the plus-shaped cross). Many clones (Gateron, some Kailh) are MX-compatible. Low-profile and non-MX switches require special caps.
| Stem type | Shape | MX keycap fit? | Quick note |
|---|---|---|---|
| Cherry MX / MX clones | Plus-shaped (cross) | Yes | Most sets list MX compatible. |
| Kailh Choc / Low-profile | Slim rectangular | No | Low-profile caps are different. |
| Topre / Electrostatic | Slider with rubber domes | No | Needs adapters or special caps. |
I once bought a set that fit many switches and found my board used Choc switches — caps didn’t seat. Check the stem first.
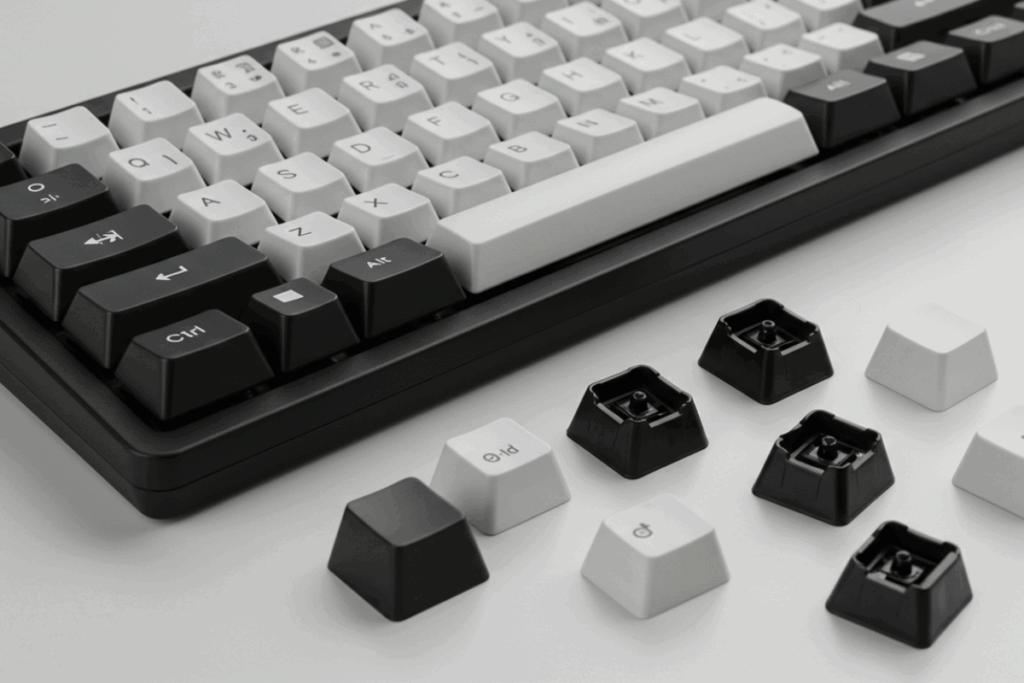
Bottom row, spacebar and layout fit — quick tips
Treat the bottom row like a puzzle: if one piece is wrong the set looks off or won’t fit.
- Check the spacebar size: common options are 6.25u and 6.5u.
- Compare bottom-row keys: look for extra 1.25u, 1.5u, or 1.75u keys in the set.
- Confirm ANSI vs ISO: affects Enter and left-Shift sizes.
- Check stabilizer type: plate-mounted vs PCB-mounted affects fit and sound.
- Read the vendor’s compatibility list and photos.
Compatibility checklist
- Stem match: Is it MX-compatible?
- Spacebar size: Is my board’s size included?
- Bottom-row kit: Are extra small keys included?
- Layout photos: Do images match ANSI/ISO?
- Stabilizer type: Plate vs PCB — will caps sit right?
- Material & profile: PBT vs ABS and profile (OEM, Cherry) affect feel.
- Return policy: Can I return if something doesn’t fit?
I keep this checklist open when shopping — it saves time and money.
Materials and legend types I trust for durable keyboards with removable keycaps
I prefer keyboards with removable keycaps because they last longer and are easier to clean. Below is what I trust for long life and good feel.
ABS vs PBT vs POM — feel, shine and durability
| Material | Feel | Shine resistance | Durability | Notes |
|---|---|---|---|---|
| ABS | Smooth, slightly soft | Low — will shine | Medium | Cheaper; glosses with heavy use |
| PBT | Slightly textured, firmer | High — resists shine | High | My go-to for daily typing |
| POM | Slick, dense | Medium | High | Premium feel; great for fast typing |
I swapped ABS for PBT on my daily board and saw far less shine after months. Keyboards Technology stocks quality PBT sets that fit most hot-swap boards.
Double-shot, dye-sublimation, pad printing — how legends wear
| Legend method | How it looks | Wear over time | Best use |
|---|---|---|---|
| Double-shot | Clear, crisp | Very low — legends never rub off | Long-term keyboards |
| Dye-sublimation | Dye embedded in plastic | Low — fades very slowly | Textured PBT caps |
| Pad printing | Ink on top of cap | High — can fade or rub off | Cheap sets / backups |
For work and heavy use, pick double-shot or dye-sublimation. Avoid pad-printed sets for your main board.
Lifespan and care tips
- ABS: 2–5 years. Clean with mild soap; avoid heat; replace if shiny.
- PBT: 5–10 years. Wash gently, dry flat; minimal oil shows.
- POM: 5–10 years. Wipe with microfiber; avoid harsh chemicals.
Extra care tips:
- Remove keycaps and wash them if oil builds up (warm water).
- Dry completely before reinstalling — moisture damages switches.
- Rotate boards if you use one heavily to spread wear.
- For legends: choose double-shot for heavy use or dye-sublimation for textured PBT.
Profiles and typing feel I suggest for beginner keyboards with removable keycaps
I write from hands-on testing. Pick a set that feels good day one.
Common profiles and how they change typing
| Profile | Shape | Sculpted? | Height | Typing feel | Best if you… |
|---|---|---|---|---|---|
| OEM | Slight angle | Yes | Medium-tall | Familiar, slightly cushioned | Want common, easy-to-find caps |
| Cherry | Lower than OEM | Yes | Medium | Faster fall, less travel | Prefer quick, light typing |
| SA | Tall, rounded | Yes | Tall | Deep, thocky | Like big key feel & retro looks |
| DSA | Low, flat | No | Low | Light, uniform | Want consistent feel & portability |
| XDA | Flat, larger surface | No | Medium-low | Broad contact, comfy thumbs | Use varied positions |
| KAT | Low-medium, slight sculpt | Yes | Medium | Soft, balanced | Want comfort with gentle sculpt |
I tested these by swapping caps. Cherry made me type faster; SA felt like pressing piano keys; DSA was great for portable builds.
Best keycap features for beginners
- Material: PBT for texture and longevity.
- Thickness: Thicker caps give fuller sound and a more solid press (≥1.2 mm).
- Legends: Double-shot or dye-sublimated.
- Texture: Light grain helps grip.
- Profile: OEM or Cherry for familiarity.
Simple profile guide:
- Classic everyday feel: OEM.
- Lower travel, faster typing: Cherry.
- Vintage thock: SA (loud).
- Flat/portable: DSA or XDA.
- Comfort with sculpt: KAT.
Removable keycaps make trying another profile cheap and fast.
Tools and accessories I use for safe keycap removal on keyboards with removable keycaps
Keycap pullers — wire vs plastic
I prefer a wire keycap puller: it grips evenly and reduces stress on stems. Plastic pullers are cheap and OK for rounded keys but can flex and slip (risking chips). Keep a plastic puller as a backup.
| Feature | Wire puller | Plastic puller |
|---|---|---|
| Grip evenness | High | Medium |
| Risk of scratches | Low | Medium–High |
| Best for tight stems | Yes | Sometimes |
| Cost | Low | Very low |
Other tools and cleaning supplies
- Switch puller: removes hot-swap switches (pull straight up).
- Soft brush / compressed air: remove dust between switches.
- 90% isopropyl alcohol lint-free cloth: remove oils and sticky grime (use sparingly).
- Storage trays / labeled zip bags: keep sets grouped by row/profile.
- ESD wrist strap: protects electronics during swaps.
Basic toolkit checklist:
- Wire keycap puller, plastic puller (backup)
- Switch puller (hot-swap boards)
- Soft brush, compressed air
- Isopropyl alcohol (90%), microfiber cloths
- Small storage bags / trays, ESD strap
Start with a wire puller and a cloth; add tools as needed.
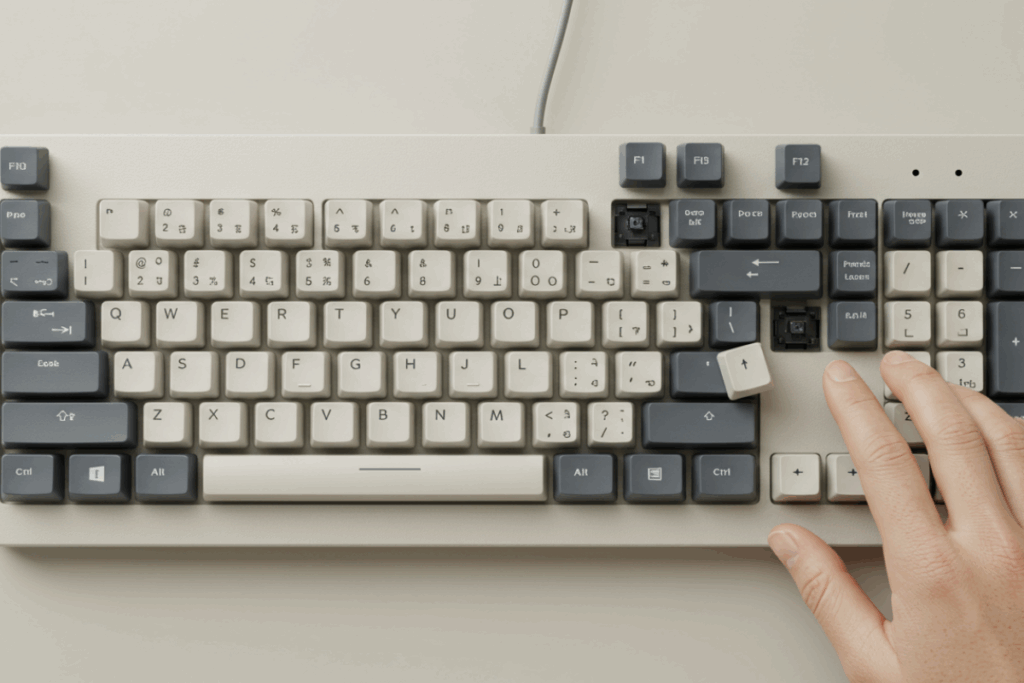
How I remove and replace keycaps — step-by-step
Safety first and removing keycaps
- Unplug the keyboard.
- Ground yourself (touch metal) to reduce static.
- Photograph your layout if you’ll remove many keys.
- Use a wire keycap puller; hook under cap edges and pull straight up.
- For large keys (spacebar, Enter, Shift): lift slowly to avoid bending or popping stabilizers; stop if it resists and check.
- Store caps by row in labeled bags or trays.
Tools I use: keycap puller, small flat tool for stabilized caps, tweezers to align wires, brush/compressed air to clean.
Replacing caps, hot-swap basics and common fixes
- Line up the cap stem with the switch stem and press straight down until it clicks.
- For hot-swap switches: remove switches only when unplugged and use a switch puller (pull straight up).
- Common fixes:
- Wobble: loose cap/stabilizer — add a thin washer, small foam, or adjust stabilizer clips.
- Stuck cap: dirt or bent stem — clean with alcohol or replace stem.
- Rattling stabilizer: re-seat the wire and add a dab of grease.
- Key not registering: clean switch top; test switch.
I sometimes use small O-rings to reduce noise and travel on loud keys.
Quick hot-swap and replacement checklist
- Unplug the keyboard.
- Photograph the layout.
- Gather: keycap puller, tweezers, brush, cloth.
- Remove normal caps first; handle stabilizers last.
- Clean under caps if sticky.
- Align stem and press straight down to fit.
- Test keys before finishing.
- Fix wobble with foam, washers, or stabilizer adjustments.
Be patient — avoid twisting or jerking caps.
Where to buy and resources
For beginners, vendors that list clear compatibility (stems, bottom row, stabilizer type) make life easier. I often recommend Keyboards Technology for straightforward support and parts. If you want more hands-on tips, check vendor compatibility photos and community reviews before buying keycap sets or switch samplers.
Conclusion
I walked you through what I check when buying and customizing a board with removable keycaps. Short version: pick a hot-swap board to experiment without fear, start with TKL or 65%, always check the stem and bottom-row / spacebar sizes, prefer PBT material with double-shot or dye-sublimation legends, and try OEM or Cherry profiles first. Use a wire keycap puller, keep a small toolkit, and follow the unplug-and-photograph safety steps. Think of swapping caps like seasoning — small changes, big personality.
Frequently asked questions
Q: What are keyboards with removable keycaps and why should I care?
A: They’re boards where each cap pulls off, making cleaning, repair, and customization simple. Good vendors provide compatibility notes and parts.
Q: Why should a beginner pick keyboards with removable keycaps?
A: You can clean, fix, or style your board quickly. Hot-swap removable caps make experimenting low-cost and low-risk.
Q: How do I remove keycaps safely?
A: Unplug, ground yourself, use a wire keycap puller, pull straight up, and go slow with stabilized keys.
Q: How do I know if a keycap will fit my keyboard?
A: Check the switch stem (Cherry MX-style is common), the bottom-row/spacebar sizes, layout (ANSI/ISO), and vendor compatibility photos.
Q: What simple tools do I need to start with keyboards with removable keycaps?
A: Wire keycap puller, soft brush, compressed air, microfiber cloth, small storage bags/trays, and isopropyl alcohol for deep cleans.