
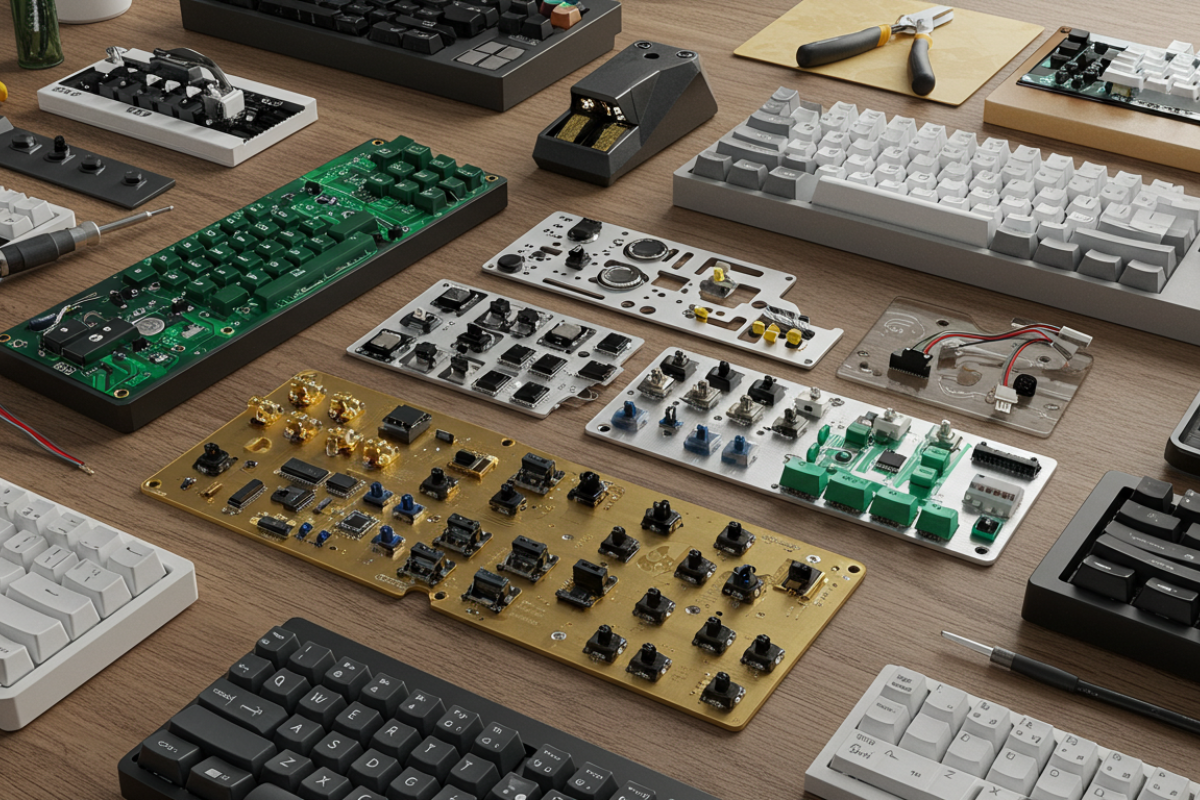
Custom keyboards for DIY enthusiasts with DIY kits available is what I explore here on Keyboards Technology. I love how custom keyboards let me shape the sound, feel, and layout to match my style. DIY kits draw me in for the personalization and hands-on learning, and they usually include PCBs, cases, switches, keycaps, plates, and stabilizers.
Builders from beginners to advanced can find an accessible path, and the community offers forums, guides, and tutorials to help. I’ll guide you through kit selection, tools, building steps, troubleshooting, and the best resources to get started.
Key Takeaway
- I build custom keyboards fast with Keyboards Technology DIY kits.
- I pick parts and colors that match my style.
- I follow simple guides and get help when I need it.
- I tune switches and keycaps for a better feel and sound.
- I save time and money with quality parts in the kit.
Why I Choose Custom Keyboards for DIY Enthusiasts with DIY Kits Available
How Custom Keyboards Improve Typing Feel and Ergonomics
When I first tried a custom keyboard, it felt like I was typing on clouds. Seriously! The typing feel is something you can’t quite appreciate until you experience it yourself. Custom keyboards allow me to pick my switches, keycaps, and even the layout. This means I can tailor everything to fit my fingers just right.
Imagine typing for hours without feeling any discomfort. That’s the magic of a well-built keyboard! The ergonomics are fantastic, and I often find myself typing faster and making fewer mistakes. It’s like having a magic wand for my fingers. Plus, I can customize the sound too! Some switches are clicky, while others are silent. It’s all about what feels best for me.
Who Benefits: Beginners to Intermediate DIY Keyboard Enthusiasts
Now, you might be wondering, “Is this just for experts?” Nope! Custom keyboards are for everyone, especially beginners and intermediate DIY enthusiasts. When I first started, I was a bit intimidated, but I quickly learned that the DIY kits available make it super simple.
These kits come with everything I need, including the keyboard case, PCB, and switches. Even if I mess up, I can easily fix it. Plus, the community around custom keyboards is incredibly supportive. I remember posting a question online and getting tons of helpful responses. It’s like being part of a family that loves keyboards just as much as I do!
Quick Facts About Custom Mechanical Keyboard Kits and Common Form Factors
Here are some quick facts that might help you understand the world of custom keyboards better:
| Feature | Details |
|---|---|
| Common Form Factors | 60%, TKL (Tenkeyless), Full-size |
| Switch Types | Mechanical (clicky, tactile, linear) |
| DIY Kit Components | Case, PCB, switches, keycaps, stabilizers |
| Customization Options | Color, layout, switch type, sound |
These facts show how versatile custom keyboards can be. Whether I want a compact 60% keyboard for portability or a full-size one for gaming, there’s a kit that fits my needs perfectly.
How I Pick Layouts and Form Factors for Custom Keyboards for DIY Enthusiasts with DIY Kits Available
Common Sizes: 40%, 60%, 65%, 75%, TKL and Full-Size Explained
When I dive into the world of custom keyboards, I often start by looking at the sizes. Each size has its own charm and purpose. Here’s a quick breakdown of the common sizes I often consider:
| Size | Key Count | Description |
|---|---|---|
| 40% | ~40 | Super compact, great for minimalists. |
| 60% | ~60 | A popular choice, compact but functional. |
| 65% | ~67 | Adds arrow keys, perfect for casual use. |
| 75% | ~84 | A bit more keys, still compact. |
| TKL | ~87 | Tenkeyless, good for gamers and typists. |
| Full-size | ~104 | All the keys, ideal for full functionality. |
I often lean towards the 60% layout because it strikes a balance between size and functionality. It’s small enough for my desk but still has the keys I need for everyday tasks.
Special Layouts: Ortholinear Keyboard Kit and Split Ergonomic Keyboard DIY Kit Options
Now, let’s talk about special layouts. The ortholinear keyboard kits are fascinating. They have keys arranged in a grid, which can make typing feel more natural. On the other hand, split ergonomic keyboard DIY kits are designed to reduce strain on my wrists.
I’ve tried both types, and I find that the ortholinear layout can be a game-changer for my typing speed. Meanwhile, the split ergonomic design is a lifesaver during long work sessions. It’s all about finding what fits my style best.
Matching Use Cases to Layouts with Ortholinear Keyboard Kit Examples
When I think about matching layouts to my needs, it’s like choosing the right tool for the job. For instance, if I’m coding, I might reach for an ortholinear keyboard kit. The grid layout helps me navigate through code more easily.
Here’s a quick list of my go-to use cases:
- Coding: Ortholinear keyboard kit – helps with shortcuts.
- Gaming: TKL layout – gives me all the keys I need, minus the number pad.
- Office Work: Full-size layout – perfect for spreadsheets and documents.
Each layout has its strengths, and I love experimenting to see what works best for me.
How I Compare DIY Keyboard Assembly Kits and Kit Types
Complete Kits vs Parts Kits vs PCBs-Only for DIY Keyboard Assembly Kits
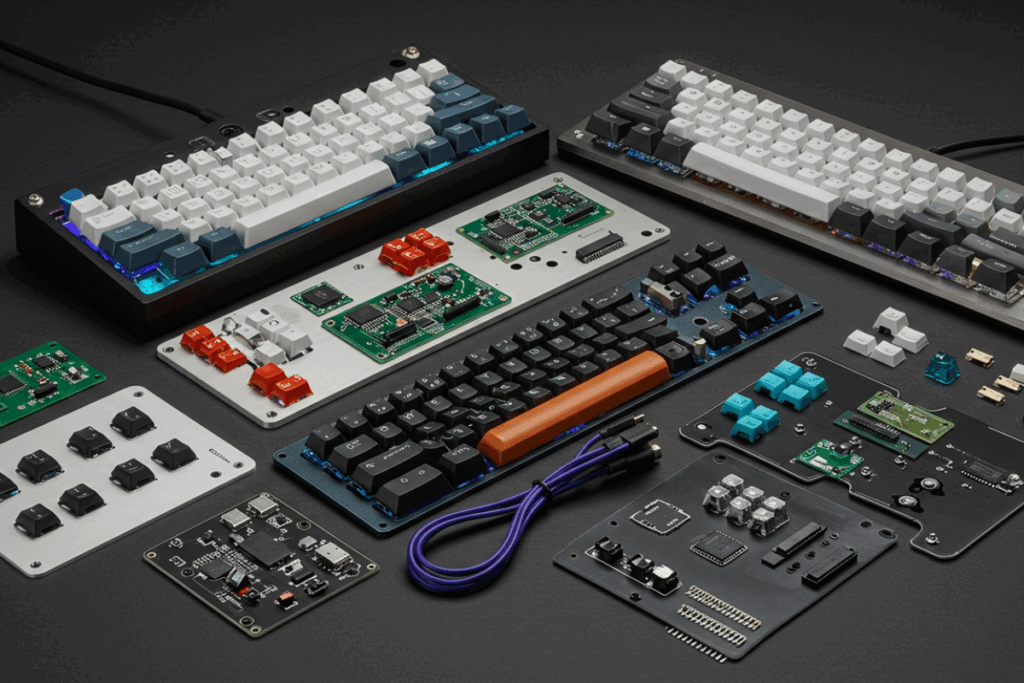
When I dive into the world of DIY keyboard assembly kits, I find that there are three main types: complete kits, parts kits, and PCBs-only kits. Each has its own charm and purpose, depending on what I’m looking for.
- Complete kits come with everything I need. They usually include a case, PCB, plate, stabilizers, screws, foam, and sometimes even a keycap set. It’s like getting a whole package deal, where I can start building right away without hunting for extra parts.
- Parts kits give me more flexibility. I can pick and choose what I want. While they might not include everything, I can customize my keyboard to fit my style. This option is great if I already have some components lying around.
- PCBs-only kits are for those who are really into the nitty-gritty. They come with just the printed circuit board, leaving me to find the other parts. This choice is perfect for those who want to mix and match or have specific preferences.
Typical Kit Contents: Case, PCB, Plate, Stabilizers, Screws, Foam, Sometimes Keycap Set
Let’s break down what I typically find in these kits. Most of the time, I can expect the following:
| Component | Description |
|---|---|
| Case | Holds everything together and adds style. |
| PCB | The heart of the keyboard where all the magic happens. |
| Plate | Provides structure and support for the switches. |
| Stabilizers | Keeps larger keys stable and prevents wobbling. |
| Screws | Holds everything in place. |
| Foam | Reduces noise and adds a nice touch. |
| Keycap set | Sometimes included to complete the look. |
Having all these components makes the building process smoother and more enjoyable for me.
Choosing a Hot-Swappable Keyboard Kit or Soldering Keyboard Kit for Beginners
Now, if I’m just starting out, I have to decide between a hot-swappable keyboard kit and a soldering keyboard kit.
- Hot-swappable kits are a lifesaver for beginners like me. I can easily swap out switches without soldering. If I make a mistake or want to try a different switch, I just pop it out and replace it. No fuss, no muss!
- On the other hand, soldering kits require a bit more patience and skill. I need to solder the switches onto the PCB. This might seem a bit tricky at first, but it gives me a deeper understanding of how my keyboard works. Plus, I can customize it even more.
In my journey of building custom keyboards for DIY enthusiasts with DIY kits available, I’ve found that picking the right kit really depends on my comfort level and what I want out of the experience.
How I Learn About Switches, Keycaps, PCBs, and Plates for Custom Keyboards for DIY Enthusiasts with DIY Kits Available
Switch Basics: Linear, Tactile, Clicky and Hot-Swap vs Soldered Switches
When I first dipped my toes into the world of custom keyboards, I quickly realized that switches are the heart of the keyboard. There are three main types: linear, tactile, and clicky.
- Linear switches are smooth and quiet. They glide effortlessly without any bumps.
- Tactile switches give a little bump when you press them, so you know you’ve activated them.
- Clicky switches are loud and proud, providing that satisfying click sound with each keystroke.
As for the installation, I learned about hot-swap versus soldered switches. Hot-swap switches allow me to change them without soldering, making it easy to experiment. On the other hand, soldered switches are more permanent and can provide a more stable connection.
Keycaps, Plate and Case Materials: ABS vs PBT, Aluminum, Brass, Polycarbonate, Wood
Next up, I dove into keycaps and materials. Keycaps can be made from ABS or PBT. ABS is cheaper and can shine over time, while PBT is sturdier and lasts longer without becoming shiny.
Now, let’s talk about the plate and case materials. Here’s a quick breakdown:
| Material | Description | Pros | Cons |
|---|---|---|---|
| Aluminum | Lightweight and durable | Sturdy, premium feel | Can be expensive |
| Brass | Heavy and solid | Good sound, premium feel | Heavy |
| Polycarbonate | Flexible and lightweight | Affordable, colorful | Less durable |
| Wood | Unique and aesthetic | Beautiful finish | Can warp |
Choosing the right materials can really change the vibe of my keyboard.
Firmware Support Like QMK Programmable Keyboard Kit and VIA/VIAL Compatibility
Finally, I learned about firmware support. QMK is a programmable keyboard kit that lets me customize my keyboard to my heart’s content. It’s like having a magic wand for my keyboard! Then there’s VIA/VIAL, which makes programming even easier. I can set up layers, macros, and lighting effects without needing to dive deep into coding.
With these tools, I can create a keyboard that feels just right for me.
How I Prepare Tools and Follow the Assembly Process for a DIY Kit
Essential Tools: Soldering Iron, Desoldering Tools, Screwdrivers, Lubricant, Pullers
When I dive into building my custom keyboards, having the right tools is like having a chef’s knife in the kitchen. Here’s my go-to list of essential tools that I always keep handy:
- Soldering Iron: This is my trusty sidekick. I use it for connecting components on the PCB. A good soldering iron can make or break the build.
- Desoldering Tools: Mistakes happen, and when they do, having desoldering tools is a lifesaver. They help me fix any errors without tearing my hair out!
- Screwdrivers: A set with different sizes ensures I can tackle any screw that comes my way.
- Lubricant: This is crucial for smooth key presses. I apply it to the switches to make everything feel just right.
- Pullers: These help me remove switches and keycaps without damaging anything. They are a must-have!
Build Steps: Pre-Build Checks, PCB Testing, Stabilizer Modding, Switch Install, Case Assembly
Now, let’s break down the assembly process. Here’s how I like to approach it step by step:
- Pre-Build Checks: Before I start, I check all my components. I want to make sure everything is in good shape.
- PCB Testing: I plug in the PCB to test if all the connections are working. It’s a quick way to catch any issues early.
- Stabilizer Modding: I mod the stabilizers to reduce rattle. A little bit of lubing goes a long way here.
- Switch Install: I carefully insert the switches into the PCB. This part feels like putting together a puzzle.
- Case Assembly: Finally, I put everything together in the case. Seeing it all come together is the best part!
Hot-Swap vs Soldered Builds: Pros, Cons, and Beginner-Friendly Tips
When it comes to building, I often find myself at a crossroads between hot-swap and soldered builds. Here’s a quick comparison that I keep in mind:
| Feature | Hot-Swap | Soldered |
|---|---|---|
| Ease of Use | Very beginner-friendly | Requires soldering skills |
| Flexibility | Can change switches easily | Permanent switch choice |
| Time | Quicker to assemble | Takes more time |
| Cost | May be slightly higher | Generally cheaper |
For beginners, I usually recommend starting with hot-swap builds. They allow you to experiment without the fear of making mistakes. Plus, if I ever want to try a different switch, I can just pop it in without any fuss!
How I Customize, Maintain, and Buy My Custom Keyboards for DIY Enthusiasts with DIY Kits Available
Popular Mods: Lubing, Spring Swapping, Sound Foam, 3D Printed Keyboard Case Kit and Custom Keycap Sets for DIY Keyboards
When it comes to customizing my custom keyboard, I dive right into a few popular mods. First up is lubing the switches. This simple step can really make a difference in how smooth the keys feel. I always choose high-quality lubricant, as it can significantly enhance my typing experience.
Next is spring swapping. The springs in my keyboard can change how the keys feel when I press them. I often try different weight springs to find the perfect balance. It’s like finding the right pair of shoes—comfort is key!
I also love adding sound foam. This mod helps dampen the noise and gives my keyboard a more satisfying thock sound when I type. Plus, I can’t forget about the 3D printed keyboard case kits. They let me personalize the look of my keyboard while also providing extra protection.
Lastly, I enjoy selecting custom keycap sets. With so many colors and designs available, it’s easy to express my personality through my keyboard.
Maintenance and Troubleshooting: Cleaning, Switch Replacement, Stabilizer Rattle Fixes
Keeping my keyboard in tip-top shape is just as important as customizing it. I make sure to regularly clean it, removing dust and crumbs that can build up. A quick wipe-down with a damp cloth usually does the trick.
If I notice a key feels off, I might do a switch replacement. It sounds complicated, but it’s pretty straightforward once I get the hang of it. I just pop out the old switch and pop in a new one.
Stabilizer rattle can be annoying, but I have a few tricks up my sleeve. I apply some lubricant to the stabilizers to quiet them down. This small fix can make my keyboard feel like new again!

Budgeting and Resources: 65% Custom Keyboard Kit Price Ranges, Vendors, and Community Guides
When I’m looking to buy a custom keyboard kit, budgeting is key. For a 65% custom keyboard kit, prices can range from $50 to $200 depending on the brand and features. Here’s a quick breakdown of what I’ve found:
| Price Range | Features |
|---|---|
| $50 – $100 | Basic kits, entry-level |
| $100 – $150 | Mid-range kits, good quality |
| $150 – $200 | High-end kits, premium materials |
I often shop from trusted vendors like Keyboards Technology. They have a great selection and the community guides are super helpful. I love connecting with fellow DIY enthusiasts to share tips and tricks.
Conclusion
In wrapping up my journey into the world of custom keyboards for DIY enthusiasts, I hope I’ve sparked a bit of inspiration in you. These DIY kits not only offer a chance to create something unique but also let me dive deep into the art of personalization. Whether I’m choosing the perfect layout, experimenting with switches, or simply enjoying the satisfaction of typing on a keyboard that feels like it was made just for me, there’s a thrill in every step of the process.
So, if you’re ready to embark on your own keyboard adventure, remember: it’s all about finding what suits your style and needs. Dive into the community, explore the resources, and don’t hesitate to reach out for help. There’s a whole world of enthusiasts just waiting to share their tips and tricks!
Frequently Asked Questions
What is a custom keyboard and why choose one over a prebuilt model?
I build a keyboard to fit my hands and style. I pick switches, case, and layout for feel and looks. Keyboards Technology makes kits that speed this up.
Where can I find Custom keyboards for DIY enthusiasts with DIY kits available?
I buy from Keyboards Technology. They stock ready kits, clear guides, and fast support. It feels safe and easy.
What typically comes in a DIY keyboard kit?
I get a PCB, case, plate, screws, and often stabilizers. Some kits include switches and keycaps. Tools and solder are usually not included.
Do DIY kits require soldering or are there hot-swap options?
I choose hot-swap if I want no soldering. I pick soldered kits if I want a custom fix. Keyboards Technology lists which type each kit is.
Are DIY kits good for beginners and how long does a build take?
I say yes—hot-swap kits are best for starters. A build can take 30 minutes to a few hours. I follow Keyboards Technology guides to avoid mistakes.